
For crisp, sustained chimes, position your foot to allow approximately a one-inch gap between the cymbals. Experiment with varying the aperture to subtly adjust the decay and color. This method permits crafting diverse timbres during a single passage.
Alter your stick placement dramatically modify the output from your foot-controlled cymbals. Strike the bell for piercing articulation or play closer to the edge for a warmer, washy wash. The angle of contact can drastically affect resonance and harmonic content.
Mastering the “splash choke” – swiftly closing the two plates after a forceful stroke – adds an abrupt cut-off. Blend this approach with ghost notes on the snare for syncopated rhythms and complex textures. Precise coordination is key to executing this move effectively.
Explore the use of different beaters, such as felt or nylon, to tailor the instrumental color and attack. Light mallets yield a softer, shimmering resonance, while hard plastic tips generate a sharper, more defined strike. This customization can significantly impact your recorded tones.
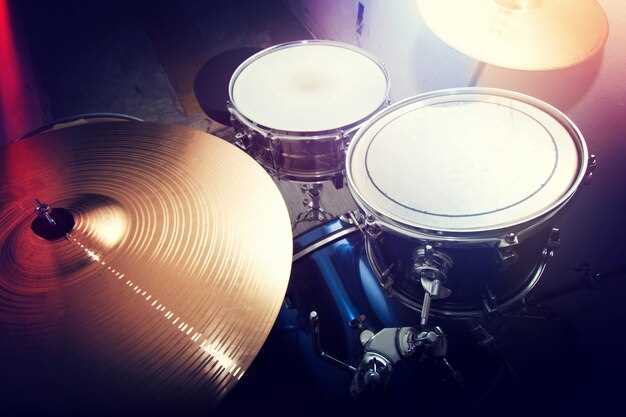
Foot Control for Cymbals Release
Refine cymbal release by adjusting pedal spring tension. Lower tension eases swift, partial closures. Higher tension grants crisp articulation but requires greater foot strength. Experiment to find balance with your kick pedal.
Employ the “heel-toe” actuation for nuanced articulation. Heel down facilitates subtle shimmering textures; toe actuation allows for sharper, pronounced accents. Practice switching rapidly between both.
Vary the gap between the cymbals for differing timbral qualities. A wide gap yields a trashier, washy articulation, while a narrower gap produces a brighter, cutting articulation. Find spots matching the musical context.
Practice Exercises for Foot Dexterity
Execute 16th-note patterns using your foot alone, varying the pressure to control the wash. Alternate between fully dampened articulation and sustained resonance. Gradually increase speed while maintaining evenness.
Advanced Techniques
Incorporate ghost notes by barely touching the pedal. This creates subtle rhythmic textures underneath your primary beat. Combine these with hand accents for complex polyrhythms.
Striking Zones: Different Tones Ajar
Adjust the tone of your cymbals by varying where you hit them. Aiming closer to the center produces a deeper, washier resonance, while striking near the edge yields a brighter, cutting articulation.
| Striking Zone | Resulting Character | Stick Angle | Recommended Music Style |
|---|---|---|---|
| Bell (edge) | Sharp “tink” articulation, short decay. | Steep angle, nearly perpendicular. | Fusion, Latin |
| Bow (near edge) | Bright sizzle, medium sustain. | Medium angle. | Rock, Pop |
| Bow (midway to center) | Full, shimmering tone, longer sustain. | Shallower angle. | Jazz, Ballads |
| Center | Darker, lower pitched ringing with prolonged release. | Very shallow angle. | Orchestral, Avant-Garde |
Experiment with different stick types (e.g., nylon vs. wood tip) in conjunction with zones to widen tonal palette. Control duration by foot pressure; apply less foot pressure for a prolonged emission.
Varied Cymbals Rhythms Across Genres
For funk grooves, try sixteenth-note figures on the partially closed cymbals, lifting pressure on beats two and four to create a “chick” articulation. This gives a syncopated feel. Experiment with different degrees of closure for tonal variation.
In rock music, utilize quarter-note pulsations on the loose cymbals for a driving, energetic backdrop. A heavier strike produces a louder, more pronounced sustain, adding weight to power chords.
Jazz cymbal work benefits from subtle variations. Use a lighter touch and experiment with different stick positions (shoulder, tip) to elicit varied timbres. Incorporate short, staccato strikes followed by longer, sustained ringing.
For Latin rhythms, integrate a cowbell pattern underneath eighth-note pulsations on the loose cymbals. Vary the intensity of the cymbal strike to match the dynamic contour of the arrangement.
Metal configurations benefit from heavily accented, partially muted strikes on the cymbals during breakdowns or transitions. Quickly choke the cymbal with your hand after each hit to create a short, aggressive accent.
When playing reggae, emphasize the offbeat with a single strike on the cymbals on beats two and four. Allow the cymbal to ring freely; this builds a relaxed, spacious rhythmic foundation.
Orchestrating the Cymbals with Limbs
Employing the sustained sizzle with your other limbs expands rhythmic options. Experiment with these specific pairings:
Foot & Snare Coordination
Sync the sustained foot chick on counts two and four with backbeats on the snare. This anchors funk grooves and provides space for melodic fills.
Hand & Bass Pedal Interplay
Coordinate the cymbals’ articulation with bass drum patterns. For instance, play eighth-note subdivisions with the stick while the foot delivers a syncopated bass line. This creates intricate polyrhythms.
Control the cymbal’s duration by partially closing it with your foot, creating staccato accents amid the wash. This provides dynamic variation.
Blending with Tom Fills
Integrate the cymbal into tom fills. As you ascend or descend across the toms, add short cymbal crashes on the higher toms and let the cymbal sing during the lower tom strikes. This enhances the impact of fills.
Vary the strike zone on the cymbal. Playing closer to the bell produces a brighter, cutting articulation suitable for accents, while striking the edge offers a washy sustain during softer passages.
Mic Placement for Ajar Cymbals: Precise Recording
Aim a small-diaphragm condenser mic, like an AKG C451 or Neumann KM 184, 4-6 inches above the bell of the partly closed cymbals, angled slightly towards the edge. This captures brightness and articulation.
For a warmer tone, position the microphone about 10-12 inches away, pointing at the cymbals between the bell and edge. This reduces harshness.
To minimize bleed from other kit components, employ a hypercardioid polar pattern. This narrows the pickup area. Alternatively, use figure-8, nulling out unwanted noise sources.
Experiment with on-axis versus off-axis placement. On-axis yields a brighter, more direct capture. Off-axis offers a mellower, diffused capture, potentially reducing sibilance.
Use a second microphone, a ribbon or dynamic such as a Royer R-121 or Shure SM57, placed under the cymbals about 6-8 inches away. This captures lower frequencies and body, which can be blended with the primary microphone for a fuller range.
Consider the player’s strike zone. Position the microphone to favor the area where the player most commonly strikes the cymbals to ensure consistent level and tone across performances.
Phase coherence is critical. If using multiple microphones, use the “3:1 rule” – the distance between microphones should be three times the distance from each microphone to its nearest sound source. Check phase with a correlation meter or by ear, and adjust microphone positions as needed to avoid cancellation.
Utilize a high-pass filter (HPF) at around 300-400Hz on the recorded track to remove rumble and low-frequency build-up. This cleans up the bottom end.
Q&A:
I’m just getting comfortable with closed hi-hat patterns. Is learning open hi-hat a big leap in difficulty, or are there approachable exercises for beginners?
It’s understandable to feel intimidated adding a new component like open hi-hat. Fortunately, there are simple exercises to ease you into it. Begin with slow tempos and concentrate on the consistent sound. A common exercise is alternating between two closed hi-hat notes and a single open hi-hat note. Gradual tempo increase and focus on precise timing are key. Don’t be discouraged if it feels awkward initially; consistent practice builds proficiency. Consider starting with a moderately open position and gradually increasing the gap for distinct sound separation.
What are some common musical genres where the open hi-hat sound is used a lot?
The open hi-hat sound finds a home in numerous musical styles. Funk employs it for rhythmic texture and drive. Rock drummers often incorporate it for energy and accentuation, especially during fills and transitions. Latin music sometimes uses it to complement clave rhythms. Jazz drummers may exploit it subtly for color and expression. Experimentation reveals its adaptability across genres, but those mentioned provide a solid starting place for observation and emulation.
My hi-hat cymbals sometimes buzz or sound “trashy” when I play them open. Is this normal, or is something wrong with my setup?
A certain degree of “trashiness” is normal and expected from open hi-hats. The type of cymbals greatly influences this. Thinner cymbals tend to produce more sustain and a “washier” sound. However, excessive buzzing could mean a few things. Ensure the hi-hat clutch is properly tightened but not overtightened; this can inhibit natural resonance. Cymbal age and accumulated dirt can also impact sound. Try cleaning your cymbals with a cleaner specifically designed for them. Also, assess the stand’s condition; loose parts can contribute to unwanted vibrations. Cymbal pairing is also vital, so experimenting with diverse pairings may yield better results.
Can you suggest some famous drummers who are well known for their open hi-hat techniques? I’d like to listen to some examples and learn from them.
Listening to masters is a wonderful idea. Drummers such as Steve Gadd are notable for their subtle and precise use of open hi-hat in a range of settings. Bernard Purdie is well known for using the sound to produce a specific groove and feel. Jeff Porcaro frequently incorporates it, and you can find examples listening to his work with Toto. Drummers in the funk, rock, and jazz genres all utilize the sound in different ways, listening to several examples will help you find a sound that suits your style of play.
How does the distance between the hi-hat cymbals when open affect the sound? Should they be just barely separated, or should there be a larger gap?
The distance between the cymbals dramatically shapes the sound’s character. A small gap produces a shorter, more controlled sizzle. A wider gap results in a longer sustain and a more pronounced, splashy sound. The ideal separation is subjective and depends on the desired effect and the music’s genre. Experimentation is key. Many drummers adjust the separation mid-song for dynamic variation. Note that too much space can lessen definition, making the sound muddy. Finding the right balance for the specific setup and application takes time and careful listening. The specific type of cymbals you are using can also affect the sound, so make sure to account for this.